Easy Banana Pudding Cake: A Sweet Slice of Nostalgia
You know that warm, fuzzy feeling you get when you bite into a slice of your favorite dessert? For me, that’s always been banana pudding cake. It’s not just a dessert; it’s a cherished memory, a beacon of nostalgia from the blissful days spent in my grandmother’s kitchen. I remember her bustling around, the sweet aroma of ripe bananas wafting through the air, and that familiar sound of the mixer running, blending the fluffy whipped topping and vanilla pudding. What’s better is that it’s an easy recipe that you can whip up during those chaotic weeknights or special gatherings—it feels like a yummy hug in a bowl. You may also find Banana Cake Filling useful.
When I decided to tackle this recipe myself, I aimed for perfection. But you know me—I had my fair share of kitchen mishaps. Oh, the time I forgot to grease the pan? Let’s just say, we had a delightful banana cake-flavored puzzle to solve! Despite those missteps, I learned that every home run in the kitchen is often built on a foundation of patience and a sprinkle of humor. So grab your apron and let me guide you through making this heartwarming treat that’s perfect for any occasion. You may also find Carrot Cake Cheesecake Bars useful.
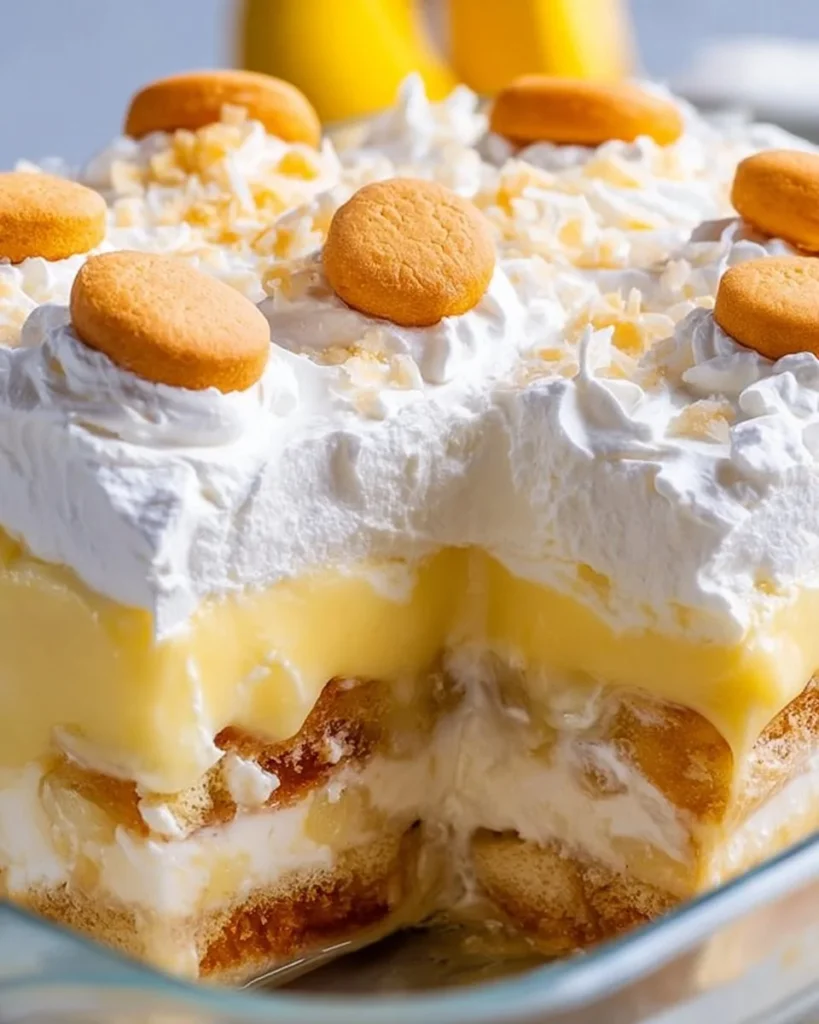
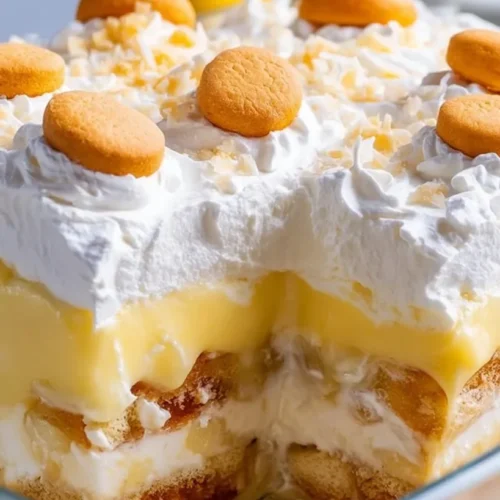
If you’re wondering why this banana pudding cake holds such a special place in my heart, it’s not just the taste. It’s the versatility and ease of it all. Whether it brings a smile during a family gathering or provides solace on a quiet evening, it’s a wonderful centerpiece. The soft, fluffy cake serves as the perfect base for layers upon layers of flavor—bananas, creamy vanilla pudding, and a light whipped topping, all topped with crunchy vanilla wafers. Honestly, who wouldn’t want to dive into that?
Why You’ll Love This Recipe
- It’s a quick assembly dessert that takes minimal effort but delivers maximum flavor!
- You’ll find that it’s perfect for meal prep and holds up well in the fridge, making leftovers a delightful treat.
- Even your picky eaters will approve because the combination of bananas, vanilla pudding, and whipped cream feels comforting and familiar.
- It’s great for any occasion: whether it’s a family barbecue, a potluck, or just an indulgent evening at home.
- If you want to get creative, there are numerous variations, allowing you to personalize it to your heart’s content!
What Makes This Recipe Special?
This banana pudding cake isn’t just any ordinary dessert. The layered components work together like a dream. The banana slices provide natural sweetness, while the whipped topping adds a light and airy texture. If you’re feeling adventurous, trying variations like my Easter banana pudding cups can bring a fresh spin to the classic recipe. It’s also an excellent base for additional flavors or mix-ins! The nostalgia it brings is tied to those sweet moments spent in the kitchen with loved ones, which always makes for a warm and inviting feel, right?
Ingredients
This recipe requires simple yet effective ingredients that are easy to find at your local grocery store. Here’s what you’ll need:
- 1 box yellow cake mix: The base of our cake. Using a boxed mix simplifies the process, making it an ideal weeknight dessert.
- 1 cup milk: This is used for mixing with the pudding, ensuring a creamy texture.
- 1 package (3.4 oz) instant vanilla pudding mix: This is where the magic happens! It adds that signature creamy flavor.
- 4 ripe bananas, sliced: The star of the show! Their sweetness elevates the cake to another level.
- 1 cup whipped topping: To fold into the pudding for that fluffy layer, plus some for garnish if you’re feeling fancy!
- 1 box vanilla wafers: For that final sprinkling on top—it provides a wonderful crunch that contrasts nicely with the soft cake and pudding.
Make sure to handle your ingredients with care. One thing I learned the hard way is to not use overripe bananas, as they can make your cake too mushy. Instead, you want bananas that are ripe but still firm for optimal texture.
How to Make It Step-by-Step
-
Prepare the cake: First, preheat your oven as per the instructions on the yellow cake mix box. Then prepare the yellow cake mix according to the package instructions and bake it in a 9×13 inch pan. The smell will fill your kitchen with warm, nostalgic notes, reminding you of the comforting days of yore!
-
Cool it down: Once your cake is baked, let it cool completely. This is crucial because you want to layer ingredients without melting anything! Be patient—good things come to those who wait!
-
Mix the pudding: While the cake cools, mix the instant vanilla pudding with the milk according to the package instructions. It’ll magically thicken before your eyes!
-
Slice the bananas: With your cake cool and pudding mixed, it’s time to add those lovely banana slices. Layer them generously over the cooled cake. This is where you can really enjoy the aroma of the fresh bananas; it’s intoxicating!
-
Spread the pudding: Carefully pour the prepared pudding over the bananas, spreading it evenly so you get a delicious bite full of sweetness in each piece.
-
Fold in the whipped topping: Gently fold in the whipped topping into the pudding mixture and then spread it evenly over the pudding layer. This step adds a delightful fluffiness that makes each bite irresistible.
-
Crush the wafers: To finish, crush some vanilla wafers and sprinkle them on top, taking it to the next level of deliciousness. Don’t forget to add a few whole wafers for decoration—you want to impress with that presentation!
-
Chill out: Refrigerate your banana pudding cake for at least 2 hours before serving. This is the toughest part, but it allows all those flavors to meld beautifully together.
You probably won’t be able to contain your excitement once it’s ready, though! And let me tell you, the first bite will definitely be worth the wait.
Tips for Best Results
- Make sure that your bananas are ripe but not too soft. The perfect ripe banana holds its shape well and provides the right sweetness.
- If you want to elevate the flavor, consider adding a layer of brown butter frosting on top for an extra touch of decadence.
- Don’t skip chilling time. It’s essential for getting those perfect layers and a set pudding texture.
Ingredient Substitutions & Variations
Sometimes we can get a bit adventurous in the kitchen! Here are some modifications you can try:
- Pudding swaps: If you’re not a huge fan of vanilla, you can easily swap the pudding for banana or butterscotch flavors!
- Healthier options: Opt for a lower-sugar cake mix or a sugar-free pudding to cut down on calories without sacrificing taste.
- Fruit upgrades: Incorporate layers of strawberries or even a hint of chocolate chips for those who love a little complexity in their desserts.
Directions
Pair this dessert with a delightful glass of cold milk or a cozy cup of coffee—it’s all about the experience! Whether enjoyed after dinner with the family or as a treat during a movie night, the combination of flavors is sure to satisfy any sweet tooth.

How to Store and Reheat Leftovers
Leftovers? Yes, please! Store your banana pudding cake in an airtight container in the refrigerator. It will last for up to three days, but honestly, it’s usually devoured in a day (no judgment here!). I recommend avoiding the microwave as it can mess with the texture, so enjoy it chilled or at room temperature.
Make-Ahead and Freezer Tips
You can prepare the cake a day in advance! Simply keep the baked cake wrapped tightly and assemble with pudding and bananas just before serving. While I haven’t tried freezing this cake, you could definitely freeze the cake itself. Just be sure to allow for some thawing time when you’re ready to assemble!
Common Mistakes to Avoid
- Skipping the cooling step: It’s tempting to rush, but a warm cake can lead to mushy bananas and soggy layers. Trust me—patience pays off.
- Too ripe bananas: Overripe bananas tend to disintegrate and make the layers not hold together well. Use ripe but firm bananas for better results.
- Not crushing the wafers: Crushing the wafers doesn’t just add texture; it gives the dish an elegant finish. Don’t forget to sprinkle them generously!
Frequently Asked Questions (FAQ)
-
Can I use a different cake flavor?
Absolutely! While yellow cake is classic, chocolate or even spice cake can work beautifully too. -
What can I use instead of whipped topping?
You can use homemade whipped cream, but remember that it may not hold up as well as the store-bought version. -
Can I freeze the pudding cake?
It’s best served fresh, but the cake itself can be frozen. Just leave out the bananas and pudding until you’re ready to serve!
Cooking Tools You’ll Need
- Mixing bowls
- A 9×13 inch baking pan
- A hand mixer or stand mixer
- Measuring cups and spoons
- Knife for slicing bananas
- A spatula for spreading
Conclusion
In the grand tapestry of comfort food, few desserts resonate like the sweet and creamy banana pudding cake. This delightful treat is steeped in tradition yet refreshingly simple to prepare. If you’re feeling adventurous, there are many delightful varieties to explore, like checking out Southern Banana Pudding Cake – Grandbaby Cakes, or diving into the Easy Banana Pudding Cake Recipe – Allrecipes. For a fun twist, try making a Banana Pudding Poke Cake – The Country Cook. Or, enjoy a summer staple by exploring Banana Pudding Cake {Summertime Staple} – Spend With Pennies.
If you enjoyed this recipe, don’t forget to save it on Pinterest or share it with a friend! Happy baking!
Banana Pudding Cake
Ingredients
For the cake
- 1 box yellow cake mix Using a boxed mix simplifies the process.
- 1 cup milk Used for mixing with pudding.
For the filling
- 1 package instant vanilla pudding mix (3.4 oz) Adds signature creamy flavor.
- 4 pieces ripe bananas, sliced The star of the show should be ripe but firm.
- 1 cup whipped topping Fold into pudding for fluffiness; plus some for garnish.
- 1 box vanilla wafers Provides a wonderful crunch topping.
Instructions
Preparation
- Preheat your oven as per the instructions on the yellow cake mix box and prepare the cake according to the package instructions. Bake in a 9x13 inch pan.
- Once baked, let the cake cool completely before adding the layers.
- While the cake cools, mix the instant vanilla pudding with the milk according to the package instructions until it thickens.
- Layer the sliced bananas generously over the cooled cake.
- Pour the prepared pudding over the bananas and spread it evenly.
- Gently fold the whipped topping into the pudding mixture and then spread it over the pudding layer.
- Crush some vanilla wafers and sprinkle on top. Add a few whole wafers for decoration.
- Refrigerate for at least 2 hours before serving.